
If you’re someone who works across multiple devices and wants to boost your productivity, you’ll be happy to know that NoteMail works seamlessly on your Mac — even though it’s designed for iPhone and iPad. Thanks to macOS support for iPad apps with Apple Silicon chips, you can now capture voice notes, get AI-powered summaries, and send them to your email without ever leaving your Mac.
Step-by-Step Guide to Using NoteMail on macOS
1. Open the Mac App Store
Launch the App Store on your Mac and search for NoteMail.
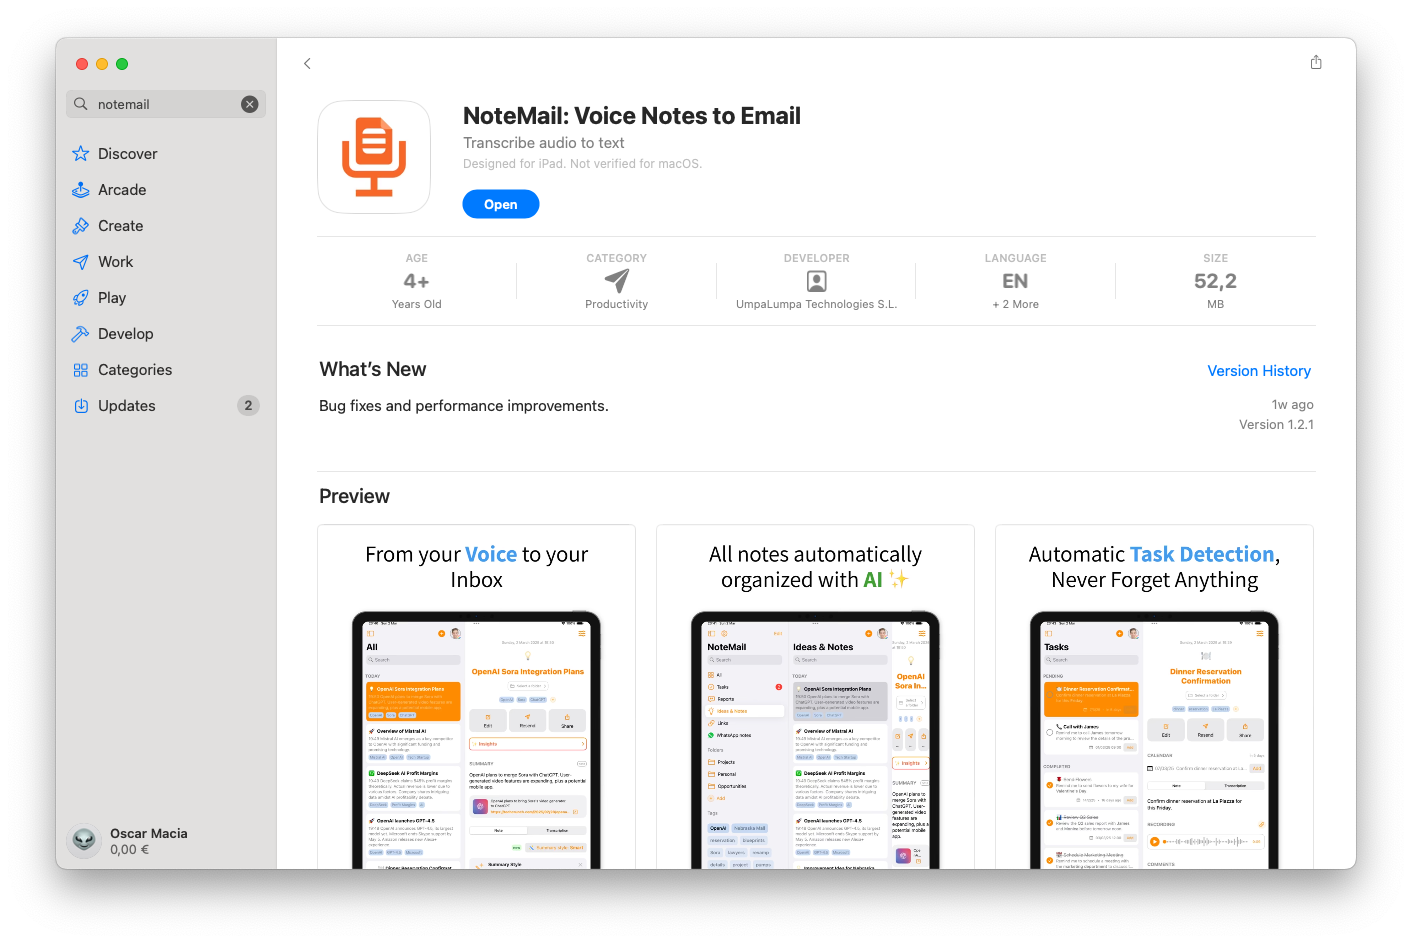
2. Download the iPad Version
Since NoteMail is optimized for iPhone and iPad, you’ll see it listed under “iPhone & iPad Apps.” Click Download — that’s all you need to do.ç
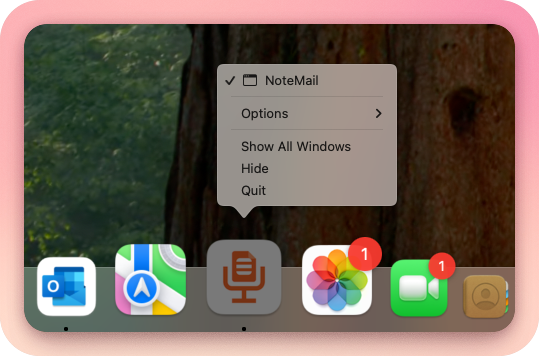
3. Launch It Like Any Other App
Once installed, you’ll find NoteMail in your Applications folder or Launchpad. Open it just like any other Mac app — no special setup required.
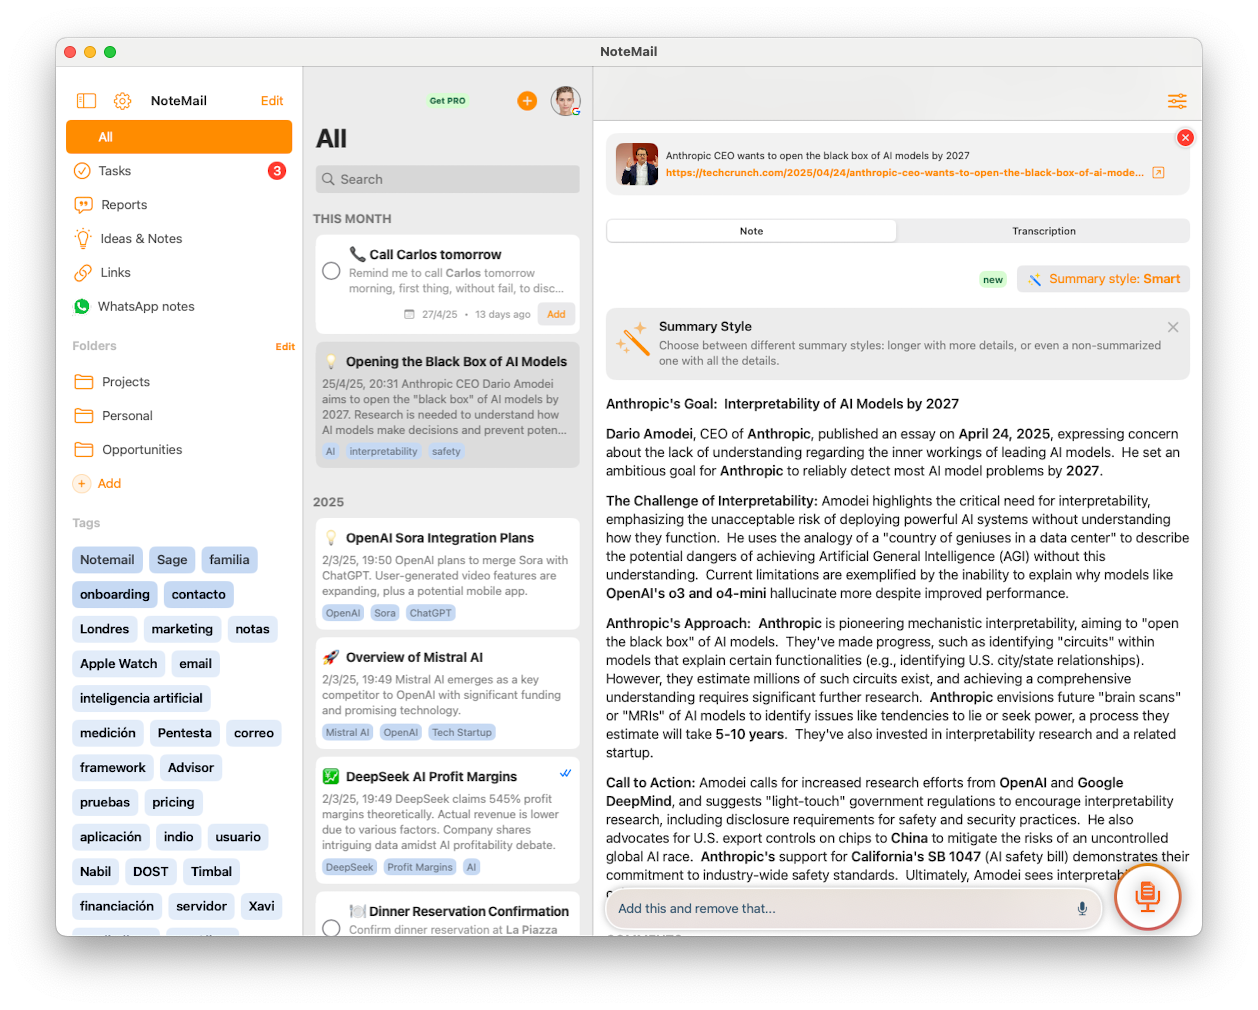
4. Sign In and Start Recording
Log in with your existing account and start recording notes right from your Mac’s built-in microphone. NoteMail will handle the transcription, AI summarization, and send it to your email — automatically.
Bonus: Use NoteMail with Stage Manager or Split View
On macOS Ventura or later, NoteMail works great with Stage Manager or Split View, so you can record notes while researching, browsing, or attending video calls.